Uploading Images
… a picture tells 1000 words …
In the rush, rush world of today, images are a great way to get a message across quickly. While describing a product you sell in detail helps search engines make it findable, an image can help sell it to a person.
Taking photos
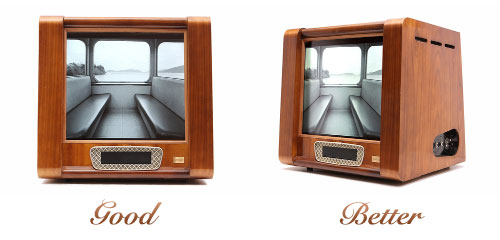
Pick an angle to snap your subject in a way that it will convey the most detail. For example, take a television set. While it looks best face on, this is a rather two-dimensional image. Taking the photo from an offset angle will show many more details. The more information someone has on a product, the more confidence they will have that it suits their needs and be more likely make a purchase.
Other aspects to consider when taking photos:
- is the object well presented? - clean it
- are the subjects is well lit? - try to remove shadows
- minimise reflection - you may need multiple dull light sources
- remove other foreign/distracting objects from the frame - a white background works best
When it comes to online shopping, the more photos the better. Try and show the product from all angles and zoom in to show details.
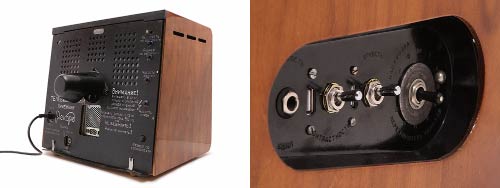
Photo credits: unknown via Avi Abrams
Resizing/Compression
Most digital cameras take images at a much larger size than you need to display on your website. A large image will also have a larger file size which will result in slower download times, meaning the user will have to wait for the image to show and no one likes to be kept waiting. You need to resize the image to be as small as possible while still showing the details.
Use the crop function of you photo editing software to frame the object and remove any extra whitespace or other objects that distract from the main object.
Your camera will allow you choose quality level before taking a photo. It is best if you set this to high. The file size of the images will be larger, but you can optimise using photo editing software. When saving/exporting the image, your software should allow you to set a compression level and file format (use JPEG for photos). Compression will visibly lower the quality of the image while reducing the file size. You will need to trial-and-error different compression levels to get an acceptable visual for the smallest file size. For product photo, under 25KB is a good target file size.
There are many ways you can resize and compress an image. You may even already have an application installed on your computer. If not, below are some suggestions to get you started:
- Squoosh - great images compression and file format changing service by Google engineers
- Google Picasa - free photo management service (both desktop and online). Read Resize by exporting for help
- Apple iPhoto - photo management application included on all new Macs
- Adobe Photoshop - professional image editing software
Uploading
Once your image is ready to add to your site, rename the file name and remove all capital letters and spaces (replace with a '-' hyphen if needed). When renaming, use a title that will make it easier for you to remember what it is (eg. 'television-back.jpg').
TIP: while it's handy for you to rename your image for referencing, it also helps search engines index it. This will help you get ranked in Google Images and Yahoo! Image Search, which can be a great source of traffic.
Adding an image to your website is a 2 step process. Firstly you need to copy the image from your computer to the web server so that everyone can access it, then you choose where to display it.
- Login to the Admin section of your site
- From the navigation bar, choose File Manager (right-hand side)
- Click images from the file list (click Root if you can not see it)
- Now you are inside the images directory, click Upload File(s)
- Next to the empty input field, click Select
- A dialog window will appear allowing you to view the files on your computer. Select the image file you want to upload
- Repeat the previous 2 steps for each image you want to upload putting a file location in each select field. Click Add if you need more fields
- When ready, click Upload to copy the files from your computer to the webserver. This will take some time depending on the number and size of the images, and the speed of your connection to the internet
When complete the page will refresh to showing you all the files on the webserver in this directory.
If you have a lot of images you want to upload, bundle them up into one .zip file and email them to us. We can add them in one batch for you.
Inserting
There are many places you can use an image on your site; on a web page, in a blog post, in a catalogue or product entry, even in an email campaign. The process for adding an image to each module differs slightly, but is pretty similar.
When using the WYSIWYG to edit content follow these steps:
![]()
- Place the cursor in the content where you want the image to appear
- Click the Image Manager button (pictured above)
- From the Image Manager dialogue navigate to the images directory (click Root if you can not see it)
- Click on the image filename to preview the image and check that you have selected the one you want to use
- Click Insert to add the selected image to the content
- In the content editor, click the image once to select it.
- At the bottom of the content area are some properties that can be changed. In the ToolTip field type a description of what the image represents
TIP: Adding a descriptive tool tip not only helps search engines index the image, but also allow users with visual disabilities to use assistive technology (like a braille reader) to better communicate your message.
As always, after publishing your changes, be sure to check that they appear as you intended before a visitor views your site.